Wednesday, August 26, 2009

Setting up Privoxy on Windows Server 2003

1) Install Privoxy
What is Privoxy? Privoxy is a non-caching web proxy with advanced filtering capabilities for enhancing privacy, modifying web page data and HTTP headers, controlling access, and removing ads and other obnoxious Internet junk. Privoxy has a flexible configuration and can be customized to suit individual needs and tastes. It has application for both stand-alone systems and multi-user networks.
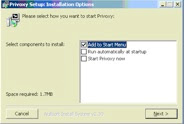
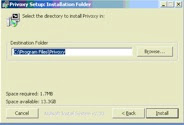
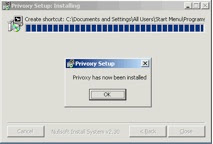
2) Setup a Privoxy User account and add it to the Local Administrators group to allow Privoxy to run as a service.


3) Set Default Domain Group Policy to disallow local-login for the service account and allow Log on as a service.


4) Set Privoxy as a service

A


5) Configure the Privoxy service to run as the Privoxy user


6) Set the Privoxy service as Automatic and set Recovery to restart the service if fails after one minute.

7) Create three new Organizational Units called “Full Internet Access” “Limited Internet Access” and “No Internet Access” and move the users into their proper organizational units.

8) Under Limited Internet Access, create a Group Policy called “IE Proxy Limited” and within that policy, uncheck “Use the same proxy for all addresses”, check “Enable proxy settings”, and in the “Address of proxy” set it to the server’s IP address for HTTP and Secure. Change the port to 8118 for those two.

In addition, within that group policy set “Disable changing proxy settings” to Enabled:

9) Under the “No Internet Access”, create a Group Policy called “IE Proxy No Internet” and within that policy, uncheck “Use the same proxy for all addresses”, check “Enable proxy settings”, and in the “Address of proxy” set it to IP address 127.0.0.1 for HTTP and Secure. Ensure to also set “Disable changing proxy settings to “Enabled”.

10) Remove the comment on "trustfile"

10) Finally add the following to the Privoxy “Trust List” and you're all done! :)

Friday, April 03, 2009

How to Print from the command line

Classexec is an amazing *and free* program. This line should do it:

"classExec.exe" "C:\Documents and Settings\ttye\test.xls" --action printto "HP Universal Printing PS" --ifexec

That line will print Excel documents from a command line to a specific printer.

The "HP Universal Printing PS" is the Printer Name.

Download it here:
http://fvue.nl/wiki/ClassExec

Thursday, January 29, 2009

Creating a bootable USB key with Syslinux and VistaPE

1) Format your USB key under VISTA or VISTAPE using diskpart:
diskpart
select disk 1
clean
create partition primary size=
select partition 1
active
format fs=fat32
assign
exit

2) Save the boot sector using Bart's mkbt.exe program. This is done on the command prompt using:
mkbt.exe -x -c E: E:\VISTABT.bs

Where E: is your USB drive.

3) Use Syslinux to install the syslinux bootsector. Download syslinux and then from the win32 folder execute the following:
syslinux -ma E:

Where E: is your USB drive.

-ma == update master boot record and make the partition active

You should now have a bootable SYSLINUX USB key. From here you can create a file on the root of your USB key called syslinux.cfg and enter the following:

#serial 0 19200
default boot
display boot.msg
timeout 250
prompt 1

label boot
kernel VISTABT.bs


When you enter "boot" you will boot the Vista boot sector. From here you can add Peter's NTPasswordChg and other linux utilities without having to use Grub4DOS or any others.

Monday, October 27, 2008

AppleTV upgrade instructions

http://forums.macrumors.com/showthread.php?p=6505512


sudo gpt destroy /dev/disk1
sudo diskutil list
sudo diskutil unmountDisk /dev/disk1
sudo gpt create /dev/disk1
diskutil unmountDisk /dev/disk1

sudo gpt add -b 40 -i 1 -s 69632 -t efi /dev/disk1
diskutil unmountDisk /dev/disk1
sudo gpt add -b 69672 -i 2 -s 819200 -t 5265636F-7665-11AA-AA11-00306543ECAC /dev/disk1
diskutil unmountDisk /dev/disk1

sudo gpt add -b 888872 -i 3 -s 1843200 -t hfs /dev/disk1
diskutil unmountDisk /dev/disk1

sudo gpt show /dev/disk1
diskutil unmountDisk /dev/disk1
gpt add -b 2732072 -i 4 -s 485665063 -t hfs /dev/disk1

sudo dd if=efi.dmg of=/dev/disk1s1 bs=1m
sudo dd if=recovery.dmg of=/dev/disk1s2 bs=1m
diskutil list


diskutil eject disk1
gpt remove -i 4 disk1
diskutil eject disk1
gpt show disk1
diskutil eject disk1
gpt add -b 2732072 -i 4 -t hfs /dev/disk1
diskutil eject disk1
newfs_hfs -J -v Media /dev/disk1s4

Thursday, October 09, 2008

Linpak vs. Prime 95

I've done some research on which programs you can use to test your overclock or stock cooling to determine if you have a stable system. Presently, the winner is Linkpak. You can get a copy with GUI front end here.

Setup:

1) BlackIce Xtreme 480
2) Laing DDC 3.25 pump
3) DTek Fusion waterblock
4) Delta AFB1212VHE 120x38mm fan

The fans were run at maximum speed.

CPU at stock was using 123W (measured via current clamp) at it's reported maximum. HWMonitor reported ~119-121W. CPU is rated for 136W.

Using a Striker II Extreme, 4GB DDR2 and a QX9770 the following overclocks were achieved:

MHZ X FSB RAM CPU V
4200 10.5 1600 1333 1.5250V


CPU at this stage was consuming 143W (via current clamp) and 139W via HWMonitor.

This passed Prime95 quad-core for over two hours.

Running Linpak with 1/4 memory used over 5 iterations resulted in a mismatch (failure).

Increasing the voltage to 1.650V resulted in a pass on Linpak using the 5 iterations, 1/4 memory. CPU was now consuming 156W via current clamp (HWMonitor ~150-153W). The temperature, however, was sitting around 90C when under load per core. Idle was ~40C.

In an effort to see where Prime95 and Linpak diverged from their pass/fail I started decreasing the voltage till Linpak failed and then continued till Prime95 failed.


VOLTAGE PRIME95 LINPAK
1.650V PASS PASS
1.625V PASS PASS
1.600V PASS PASS
1.575V PASS FAIL
1.550V PASS FAIL
1.525V PASS FAIL
1.500V FAIL FAIL


Each pass of Prime was run for 2 hours. Linpak took less than a few minutes. In an effort to "increase" Linpaks sensitivity I increased it's memory consumption to 1/2 and iterations to 10. This did show a more sensitive failure point.


VOLTAGE PRIME95 LINPAK
1.650V PASS PASS
1.625V PASS PASS
1.600V PASS FAIL
1.575V PASS FAIL
1.550V PASS FAIL
1.525V PASS FAIL
1.500V FAIL FAIL


Linpak's time to run each completed set of tests more than doubled but was still less than 10mins.

During this time Linpak created more heat then Prime95 as well, although Intel still provides tools that actually generate *more* heat then Linpak can do (about 5-10W more).

In the end, Linpak is a great tool and signficantly more sensitive and faster at finding stable clocks then Prime95.