Tuesday, April 20, 2010

Pushing View Controllers

Pushing View Controllers is ridiculously simple. You can do it in 2 lines of code, but with 2 dependancies.
1) Create a navigationController object in the AppDelegate file (.h and .m).
2) You must make a UIViewController object and add its header to the View Controller header you want to push *from*
3)

PhotoListView *secondPage = [[PhotoListView alloc] initWithNibName:@"PhotoListView" bundle:[NSBundle mainBundle]];

[[self navigationController] pushViewController:secondPage animated:YES];


4) Done.

Getting back into Objective-C Programming

Thanks to Stanfords C193P course.
Some things I've found along the way:
FYI, because of the black text you'll need to copy/paste to see the entire codeblock
Convert a NSArray to C array:

NSArray *pointsArray = [PolyShape pointsForPolygonInRect:rect numberOfSides:[polygon numberOfSides]];

//count the number of objects in the array and set a matching integer

int i;

i=[pointsArray count];

//setup our C array to match the number of objects in the pointsArray...

CGPoint thePointArray[i];

//for each object in the pointsArray, set a CGPoint value, add it to the C-Array (thePointArray) in it's matching index

for (id object in pointsArray) {

CGPoint thePoint = [object CGPointValue];

i--;

thePointArray[i] = CGPointMake(thePoint.x, thePoint.y);

}

Friday, January 15, 2010

Uninstall products from the command line

Uninstalling products from the command line is tricky when there is no shortcut to parse. So we need to go to the registry and pull out information of where the program exists in there, and the proper product code (a GUID). that's unique to every system. To do this I have employed the mightiest of tools, egrep.

You'll need to find egrep for Windows. It's getting harder and harder to find.

Here's a script I made to uninstall a program called "Driver and Utility".

reg query
HKEY_LOCAL_MACHINE\SOFTWARE\Microsoft\Windows\CurrentVersion\Installer\UserData\S-1-5-18\Products
/s > "%TEMP%\reguninstall.txt"
TYPE "%TEMP%\reguninstall.txt"
\\myk\netlogon\grep.exe -B 15 -E "Driver & Utility" \\myk\netlogon\grep.exe -o -E
"UninstallString.+"
\\myk\netlogon\grep.exe -o -E "MsiExec.+" > "%temp%\uninstallcmd.txt"
FOR /F "tokens=1-10 delims={" %A IN ('TYPE "%temp%\uninstallcmd.txt"') DO
msiexec.exe /x {%B /qb

You'll have to excuse the line cropping. This script does 3 things.

#1, it pulls every program option from the registry and saves it in a file
#2, it then greps for the program name. This needs to be specific. Using grep we can ask it to pull lines previous to finding the query. We pull back 15 lines because it's a big key and we need to find the GUID
#3, we make a variable out of the GUID and execute the uninstall command.

The final uninstall command should look like this:

msiexec.exe /x {48435D4A-BDAF-4AC3-B172-B25F1AADE6C6} /qb

Voila.

Tuesday, September 29, 2009

Remote Logoff terminal sessions:
http://anandpv.spaces.live.com/blog/cns!AFCCA5892B178862!804.entry

How to logoff remote desktop sessions via command line tools?

This trick I learned from my one of ex-college. In Windows servers, only two remote desktop sessions allowed with administrative access. There are situations, you can't connect to the server via remote desktop because of two sessions already active. You may have seen this dialog box. ("Remote Desktop Disconnected", "This computer can't connect to the remote computer")

Usually Windows Administrators, open "Terminal Services Manager" (in Administrative tools), connect to the problematic server and log off the unwanted sessions. There are easy ways if you love command line based tools.

Query the Remote Server for Current Terminal Sessions

To query and list the sessions on the remote session, you could use QUser.exe or QWinsta

1. QUser

QUser command comes with all the latest Windows clients and servers. This will list the sessions of the remote server (or local machine).

NOTE: if you are using Windows XP, you need to add this location into your System path: C:\Windows\System32\DLLCache. To do this, in command prompt, type the following.

SET PATH = %PATH%;C:\Windows\System32\DLLCache;

QUser help shows,

C:\Anand>QUser /?
Display information about users logged on to the system.

QUERY USER [username | sessionname | sessionid] [/SERVER:servername]

username Identifies the username.
sessionname Identifies the session named sessionname.
sessionid Identifies the session with ID sessionid.
/SERVER:servername The server to be queried (default is current).

E.g.,

C:\>quser /server:MyCitrixSVR
USERNAME SESSIONNAME ID STATE IDLE TIME LOGON TIME
johndoe ica-tcp#966 10 Active 7 7/31/2008 3:04 PM
averagejoe ica-tcp#969 1 Active 9 7/31/2008 3:30 PM
familyman ica-tcp#984 5 Active 1:06 7/31/2008 4:33 PM
normaldude ica-tcp#987 2 Active 4 7/31/2008 6:20 PM

2. QWinsta

QWinsta is little different and better. It has more features and options. It comes with all flavors of Windows. QWinsta command line help displays as,

C:\>qwinsta /?
Display information about Terminal Sessions.

QUERY SESSION [sessionname | username | sessionid]
[/SERVER:servername] [/MODE] [/FLOW] [/CONNECT] [/COUNTER]

sessionname Identifies the session named sessionname.
username Identifies the session with user username.
sessionid Identifies the session with ID sessionid.
/SERVER:servername The server to be queried (default is current).
/MODE Display current line settings.
/FLOW Display current flow control settings.
/CONNECT Display current connect settings.
/COUNTER Display current Terminal Services counters information.

E.g.,

C:\>qwinsta /server:citrixserver
SESSIONNAME USERNAME ID STATE TYPE DEVICE
0 Disc rdpwd
ica-tcp 65536 Listen wdica
rdp-tcp 65537 Listen rdpwd
console 16 Conn wdcon
ica-tcp#966 johndoe 10 Active wdica
ica-tcp#969 apple 1 Active wdica
ica-tcp#984 averagejoe 5 Active wdica
ica-tcp#987 familyman 2 Active wdica
ica-tcp#989 whoisme 3 Active wdica

You are welcome to try the other options QWinsta provides.

Logoff the Remote Sessions

To Log off the terminal session of the remote server, you can use any one of two command line tools. One of LOGOFF and another one is RWINSTA. Before you log off the remote session, you should know the "Session ID" which you get it from "QUSER" OR "QWINSTA" commands as above stated.

1. Logoff

Logoff command kicks off (logging off) the specified remote session. Log off help shows,

C:\>logoff /?
Terminates a session.

LOGOFF [sessionname | sessionid] [/SERVER:servername] [/V]

sessionname The name of the session.
sessionid The ID of the session.
/SERVER:servername Specifies the Terminal server containing the user
session to log off (default is current).
/V Displays information about the actions performed.

E.g.,

C:\>logoff /server:infra-apps 1 /v
Logging off session ID 1

2. RWinsta

RWinsta has same parameters and does same thing as log off command. It simply means Reset WINdows STAtion. The help goes as,

C:\>RWinsta /?
Reset the session subsytem hardware and software to known initial values.

RESET SESSION {sessionname | sessionid} [/SERVER:servername] [/V]

sessionname Identifies the session with name sessionname.
sessionid Identifies the session with ID sessionid.
/SERVER:servername The server containing the session (default is current).
/V Display additional information.

E.g.,

C:\>RWinsta /Server:MyWinServer 1

Note: RWinsta command does not return anything.

Happy Re-setting the remote sessions (Hey, stop cursing your co-workers who didn't log off their sessions).

Keywords: Reset remote session, Remote Desktop Session

Wednesday, August 26, 2009

Setting up Privoxy on Windows Server 2003

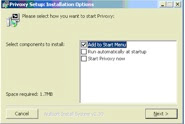
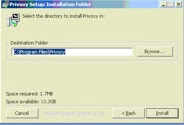
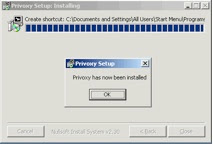
1) Install Privoxy
What is Privoxy? Privoxy is a non-caching web proxy with advanced filtering capabilities for enhancing privacy, modifying web page data and HTTP headers, controlling access, and removing ads and other obnoxious Internet junk. Privoxy has a flexible configuration and can be customized to suit individual needs and tastes. It has application for both stand-alone systems and multi-user networks.


2) Setup a Privoxy User account and add it to the Local Administrators group to allow Privoxy to run as a service.


3) Set Default Domain Group Policy to disallow local-login for the service account and allow Log on as a service.


4) Set Privoxy as a service

A


5) Configure the Privoxy service to run as the Privoxy user


6) Set the Privoxy service as Automatic and set Recovery to restart the service if fails after one minute.

7) Create three new Organizational Units called “Full Internet Access” “Limited Internet Access” and “No Internet Access” and move the users into their proper organizational units.

8) Under Limited Internet Access, create a Group Policy called “IE Proxy Limited” and within that policy, uncheck “Use the same proxy for all addresses”, check “Enable proxy settings”, and in the “Address of proxy” set it to the server’s IP address for HTTP and Secure. Change the port to 8118 for those two.

In addition, within that group policy set “Disable changing proxy settings” to Enabled:

9) Under the “No Internet Access”, create a Group Policy called “IE Proxy No Internet” and within that policy, uncheck “Use the same proxy for all addresses”, check “Enable proxy settings”, and in the “Address of proxy” set it to IP address 127.0.0.1 for HTTP and Secure. Ensure to also set “Disable changing proxy settings to “Enabled”.

10) Remove the comment on "trustfile"

10) Finally add the following to the Privoxy “Trust List” and you're all done! :)